

Can You Apply Microcement Over Tiles in Toronto?
Microcement over tile can be a practical way to update a dated bathroom, kitchen or feature wall in Toronto without automatically committing the project to demolition. The honest answer is yes—when the existing tile assembly is sound, firmly bonded and appropriate for the room.
Before we specify a seamless finish, we assess movement, cracked or hollow tiles, grout depth, moisture exposure, transitions and the preparation needed beneath the final surface. A thin, continuous finish does not conceal an unstable base; its durability begins with the substrate.
What is Microcement?
Microcement is a thin, hand-applied decorative coating system used to create continuous surfaces with subtle trowel movement and no visible grout grid. It is specified for its quiet, mineral character as much as for the visual continuity it can bring to a room.
Because the finished layer is thin, it follows the condition of what sits below it. That makes substrate preparation, detailing and the selected protective system as important as the colour or texture chosen for the final surface.
Speak To Shayan 416 (606) 8060 or Request A Quote
Why Microcement Is Considered for Tile Renovations
Microcement is often considered when a client wants a continuous surface without the visual interruption of grout lines. It can work across walls, floors, bathroom surfaces and selected kitchen details, but those applications are not interchangeable: movement, moisture, existing finishes and traffic all change the preparation and system.
Can You Apply Microcement Over Tiles?
Microcement can be installed over existing tile when the surface is sound, stable and appropriate for the intended use. An assessment confirms whether repairs, levelling, reinforcement or removal are required before the finish is specified.
When Microcement Can Go Over Tile
A suitable tile surface is firmly bonded, reasonably flat and free of active movement or moisture problems. Preparation may include cleaning, deglossing where required, local repairs, managing grout lines, levelling and reinforcement selected for the substrate and intended use. The benefit is a continuous finish with less disruption than a full tile removal—when the existing assembly is a reliable base.
When Tile Should Be Removed First
Tiles that are loose, hollow, extensively cracked, moving, affected by moisture or too uneven to prepare reliably should be repaired or removed first. In showers, bathrooms and floor projects, the condition of the full assembly—not just the visible tile—determines whether microcement is appropriate.
Is Your Existing Tile a Good Candidate for Microcement?
The decision is not based on whether the tile looks dated. It is based on whether it can become a stable part of the new assembly. We assess the tile in person before confirming the specification.
| What we check | An overlay may be suitable when | Repair, removal or a rebuilt base may be needed when |
|---|---|---|
| Bond and stability | Tiles are firmly bonded and do not sound hollow or move under pressure. | Tiles are loose, hollow, rocking or extensively debonded. |
| Cracks and movement | There is no active substrate movement and local defects can be properly addressed. | Cracks continue through the tile and base, or the floor flexes underfoot. |
| Grout and flatness | Grout lines and local variation can be levelled within an appropriate build-up. | Deep joints, pronounced lippage or an uneven plane would compromise the finished surface. |
| Moisture and waterproofing | The room is dry, or the existing wet-area assembly is confirmed sound and can be detailed correctly. | There are signs of a leak, trapped moisture, failed waterproofing or damage behind the tile. |
| Drains, edges and transitions | Drains, corners, thresholds and adjacent finishes can be planned as part of the system. | Existing drainage, movement joints or transitions need correction before a continuous finish is specified. |
Photographs are a useful starting point, but they cannot confirm bond or what is behind a shower wall. The site assessment is the decision point.
Practical Questions Before You Choose an Overlay
Will it change floor height or affect doors?
Microcement is built in thin layers, but “thin” is not the same as “irrelevant.” We review door clearances, thresholds, drains, fixtures and adjacent finishes before confirming an overlay. A detail that works on a wall may need a different approach on a floor or at a shower entrance.
Is a microcement bathroom or shower floor safe when wet?
The selected texture, finish and protective system need to suit the location. Wet floors, shower trays and dry walls do not receive the same specification; intended use is considered alongside appearance when we prepare the sample and system.
When can the space be used?
Application, drying and final cure are separate stages. The return-to-use timing depends on the approved system, room conditions and whether the surface will receive direct water or heavy traffic. We confirm the project-specific sequence before work begins rather than promising a generic turnaround.
What drives the scope and cost?
The finish area is only one part of the scope. Tile repairs, grout depth, levelling, reinforcement, waterproofing, drain and threshold details, access, masking and the chosen final protective system all affect the work required. A photo review and site assessment let us price the correct build-up rather than a cosmetic shortcut.
For an initial review, send clear photos of the tile, grout lines, corners or edges, drains and nearby thresholds. We can then advise whether an on-site assessment is the right next step.
For bathrooms and showers, see our Microcement Bathrooms service; floor projects should be assessed against the requirements for Microcement Floors. Explore the wider Microcement Toronto guide for other applications. Read more about our recent project in a Yorkville condo where we applied microcement over backsplash tile and countertop as part of a kitchen renovation.


No-Demo Bathroom Renovation in Toronto: The Microcement Over Tile Application Process
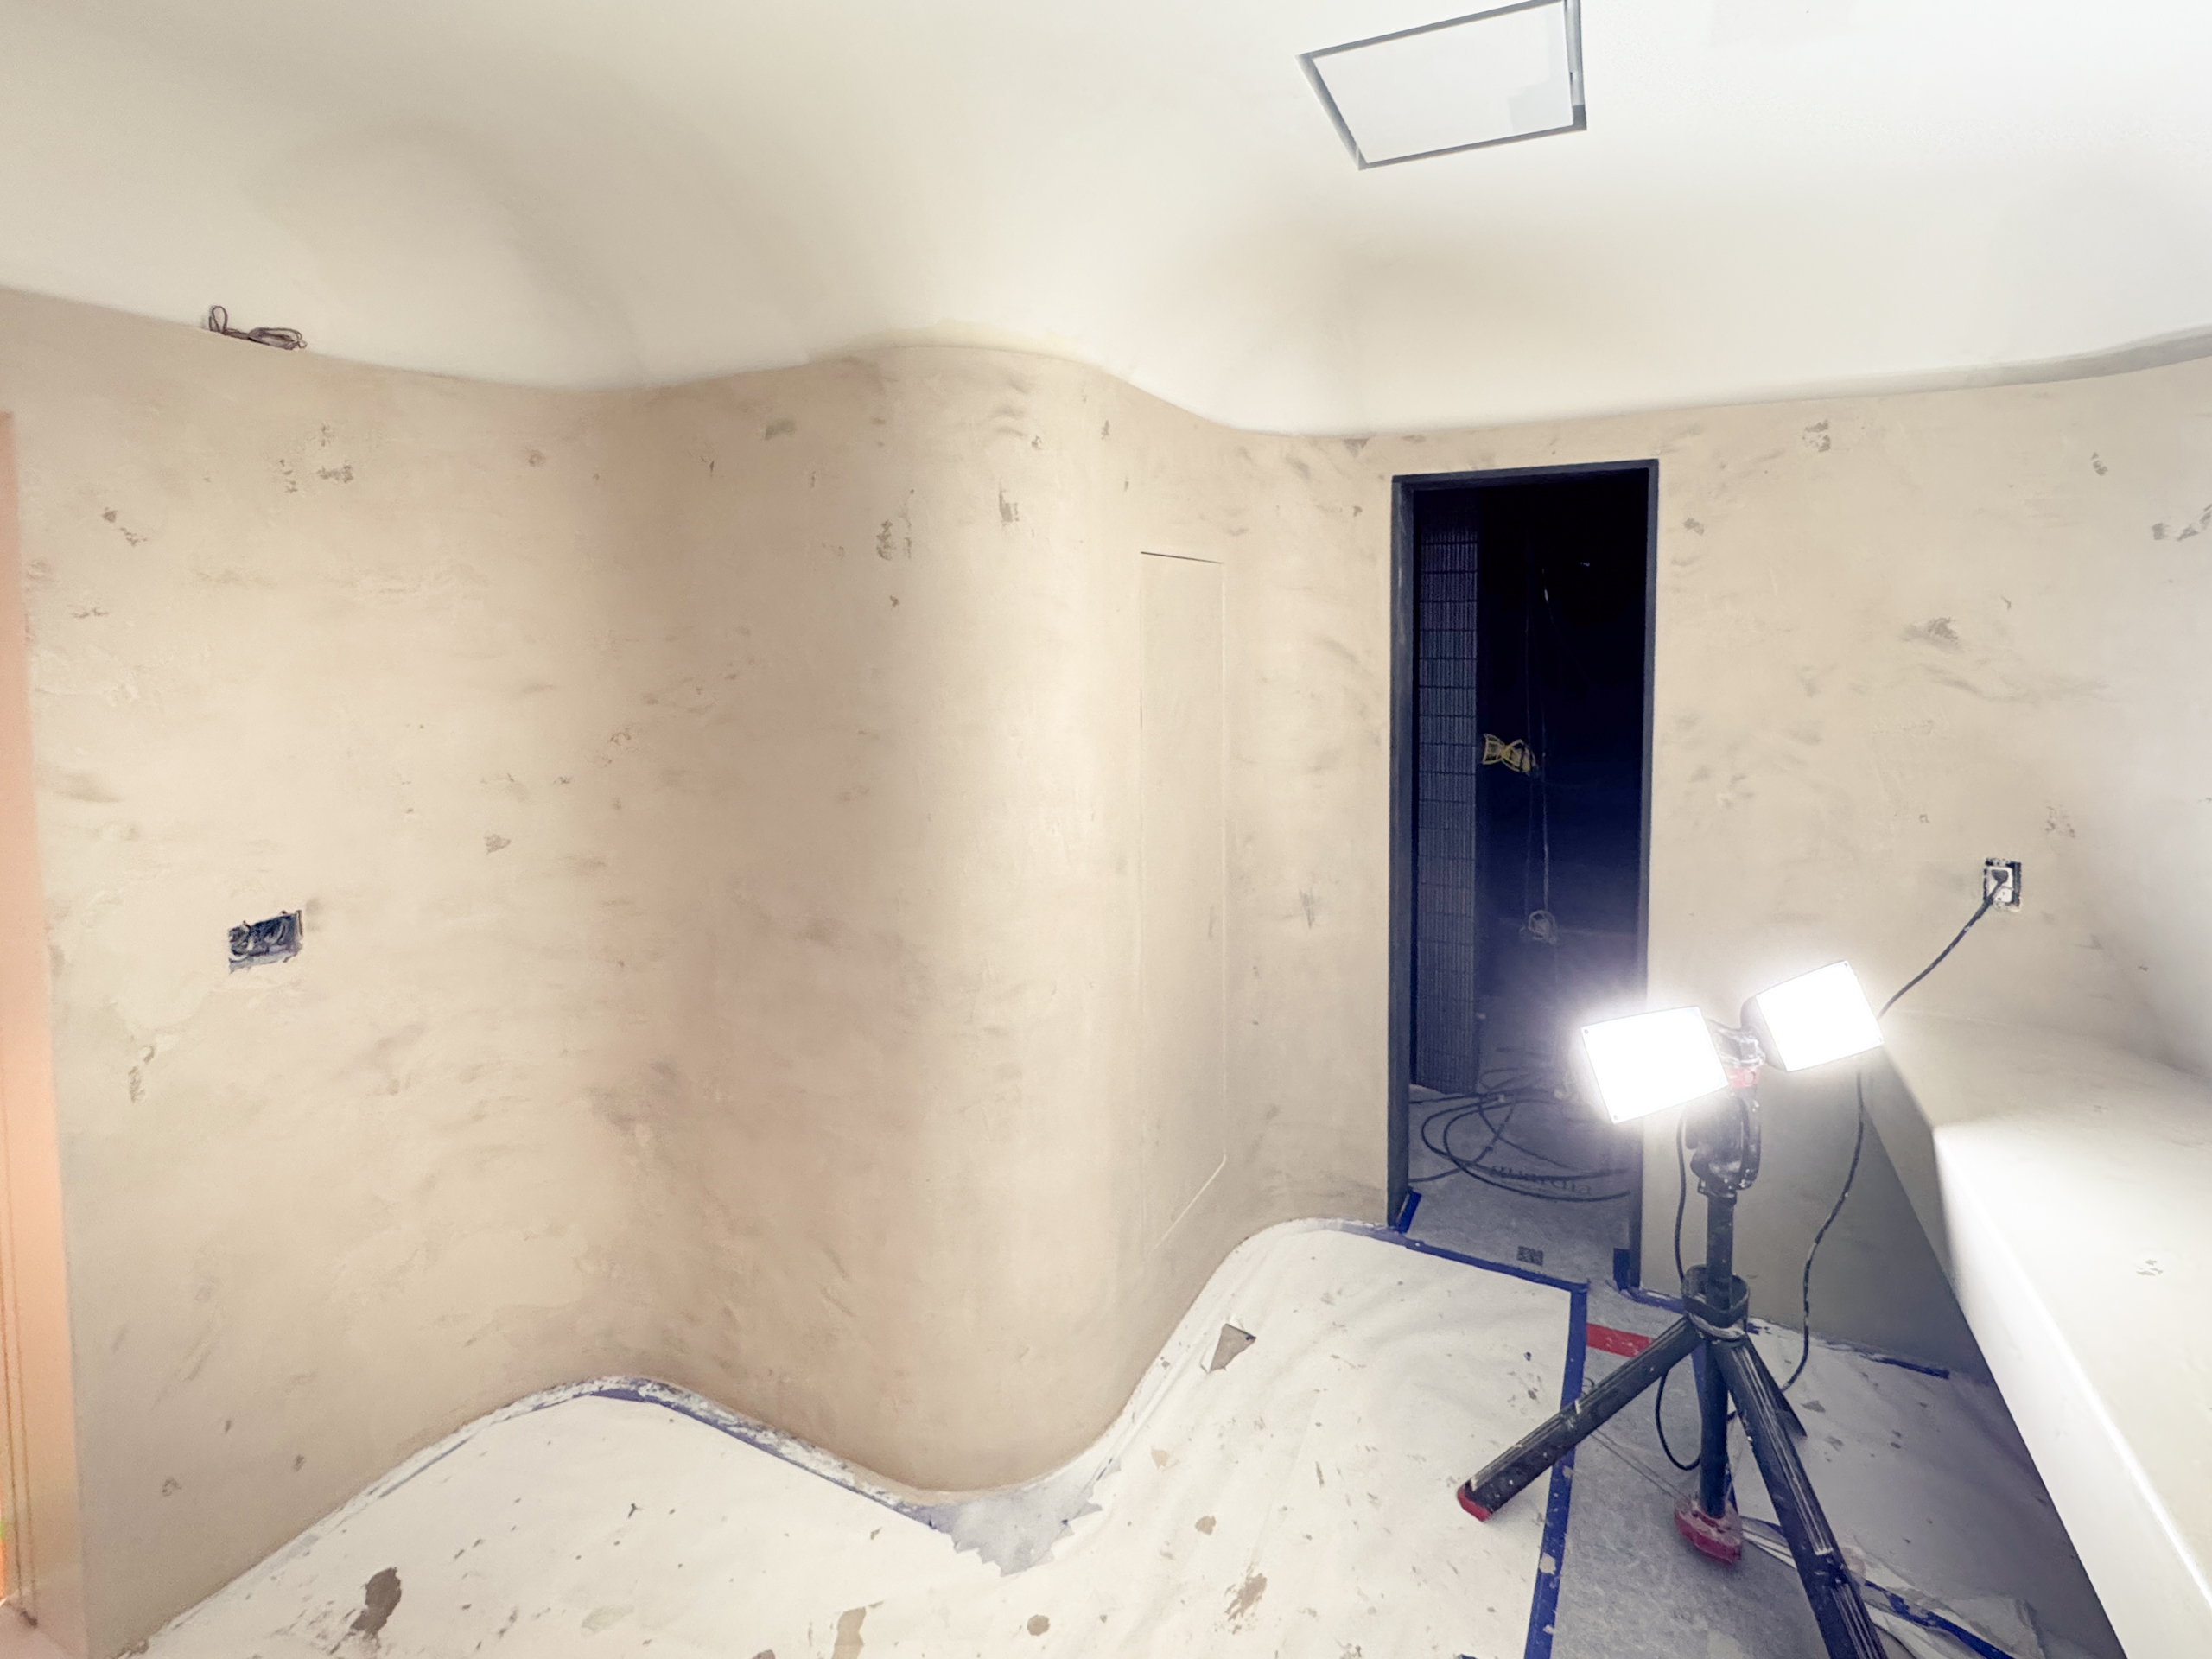
Microcement over tile for shower floors and walls – Toronto, Ontario


Microcement Over Tile Feature Wall in York-Toronto Renovation, in collaboration with D|S Interiors.
How We Apply Microcement Over Tile: From Assessment to Sealer
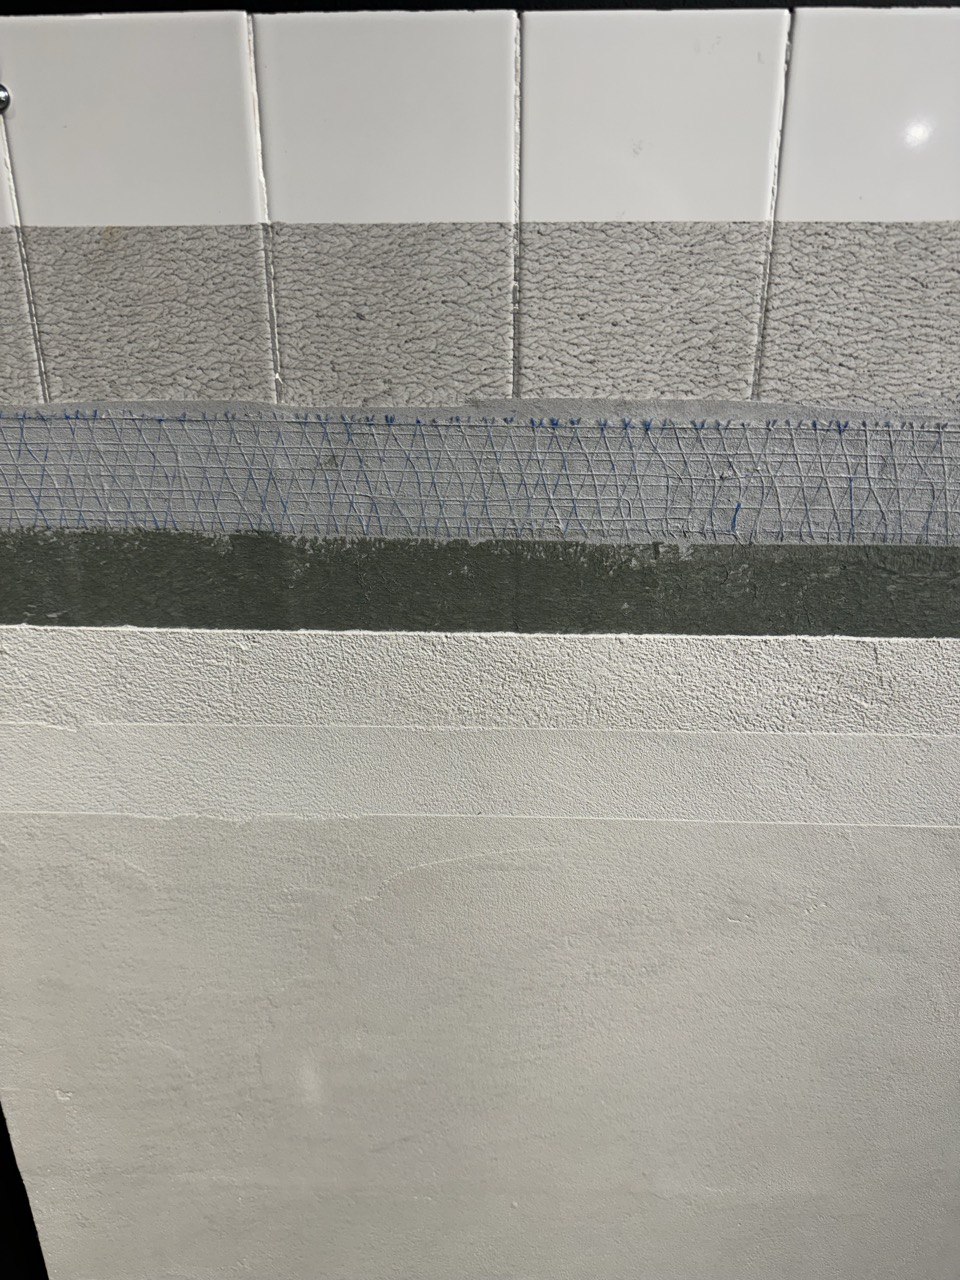
The process video above shows the visible transformation. The essential work happens before the final surface: we assess the tile as a substrate, prepare it as a bonded base, reinforce areas that need it, then build and protect the finish as one continuous system.
- Assess the existing tile and the room. We check adhesion, cracks, hollow areas, grout depth, movement and—where relevant—signs of moisture or a compromised wet-area assembly. A surface that cannot become stable is addressed before microcement is specified.
- Clean, repair and create an even base. Tile is cleaned and prepared for bonding. Local defects, voids and grout lines are managed so the finished surface is not asked to hide an unstable or uneven substrate.
- Prime and reinforce where the surface requires it. The primer and reinforcement are selected for the existing material and use of the room. Mesh is used where it is needed to help the new system bridge the tile pattern and read as one plane; it is not a substitute for correcting a failed base.
- Build the microcement in thin, hand-applied layers. The base and finish layers are applied, allowed to cure and refined between stages. This is where the continuous surface, tonal movement and desired texture begin to take shape.
- Detail transitions and seal the completed surface. Edges, junctions, drains, thresholds and changes of plane are considered before completion. The final protective system is chosen for the room and intended use, giving the finish its day-to-day stain and water resistance.
Bathrooms, showers, floors and kitchen details do not receive a generic one-system answer. In wet areas, the waterproofing behind the finish must be appropriate and sound; microcement is the visible finish, not a cure for a failed assembly. That is why the assessment comes before the colour sample and why the process changes with each substrate.
Where Else Can Microcement Be Applied?
Microcement is incredibly versatile and can be used on various surfaces beyond tiles, including:
- Walls and Floors: Ideal for creating seamless interiors in bathrooms, kitchens, and living spaces.
- Countertops: Durable and water-resistant, perfect for kitchens and bars.
- Staircases: Adds a sleek, modern look to interior and exterior staircases.
- Furniture: Can be used on tables, shelves, and even planters for a cohesive design.
- Outdoor Spaces: Perfect for patios, poolsides, and facades due to its weather resistance.


Toronto Coffee Roaster’s Tasting Bar Surfaced with Light Grey Microcement
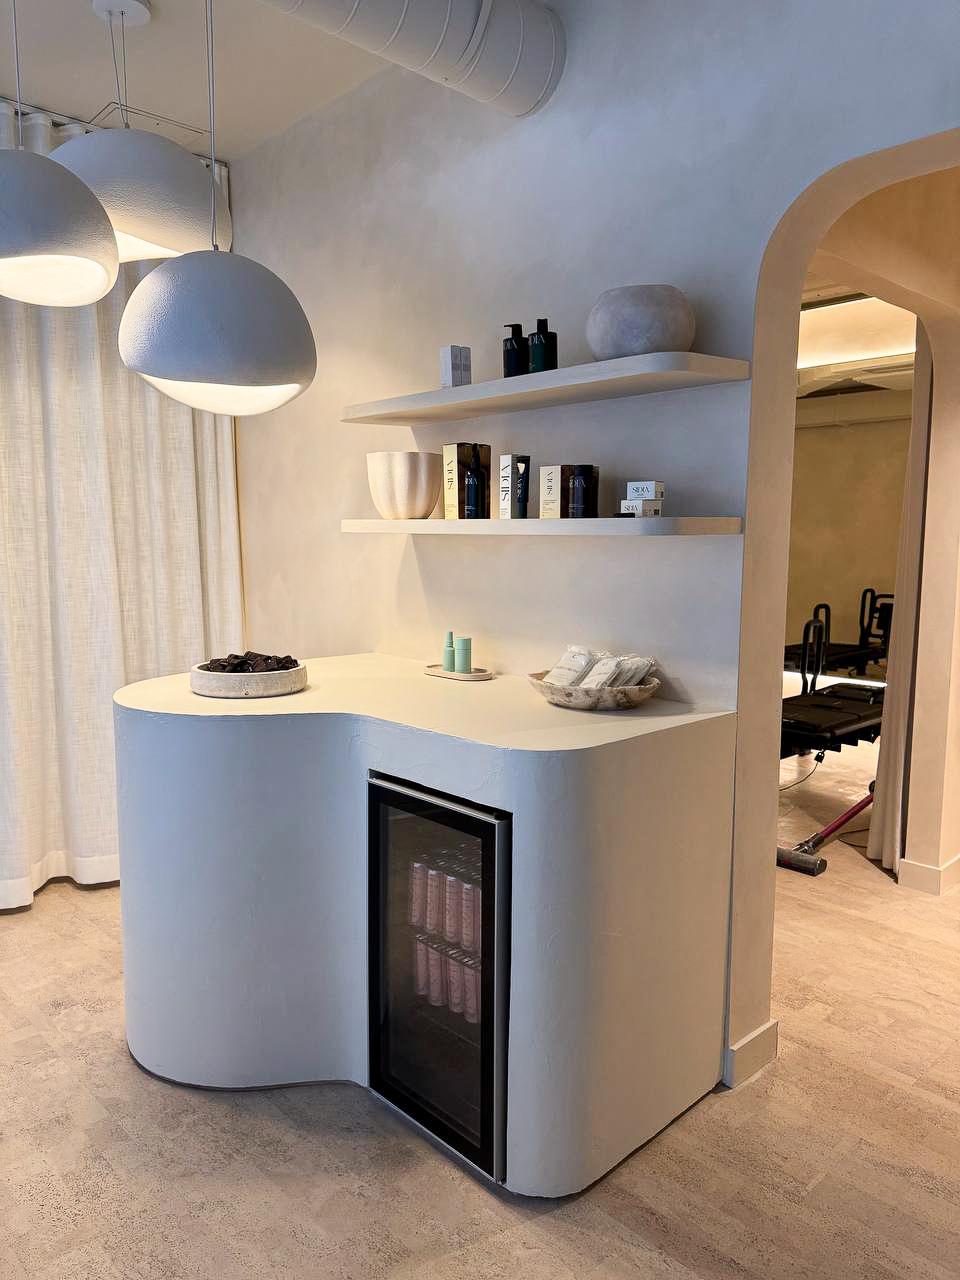
Etobicoke Pilates Studio Gets a Seamless White Microcement Reception Desk
Common FAQs About Microcement Over Tile
For an existing tiled surface, the practical question is not whether microcement can hide the tile; it is whether the tile can serve as a stable part of the new assembly. That is why the assessment comes first—and why the finish looks effortless only after the substrate, detailing and sealing have been properly planned.
Ready to transform your space with microcement?
If you’re looking to achieve a modern, seamless, and durable finish for your place, microcement is the perfect choice. Whether it’s a spa, a pilates studio, your home or a yoga studio this versatile material can elevate the look and feel of any space.
Contact us today to discuss how we can bring your design vision to life with our expert microcement application services. Let’s create stunning, low-maintenance interiors that combine beauty with lasting durability!